

 We’re excited to announce that BritMums is partnering with Etsy to celebrate great crafting and provide advice for all you entrepreneurs and entrepreneurs-to-be who have been toying with setting up a business based on your crafts or other work.
More than ever, crafting is a growing blogging and social media niche, with some stellar BritMums members making beautiful things and dispensing advice to make them ourselves.
We’ll be featuring cool crafts and inspiring creators over the coming weeks. We kick off the programme with this fun children’s bear cape, by an Etsy shop owner who used to work with the luxury label Natori. Over to its creator, Xenia:
Bear Hood Cape
DIY tutorial by Xenia Kuhn, a Berlin-based fashion designer
My family and I emigrated to Germany from the former Soviet Union in 1995. After graduating with a degree in Fashion Design from a Berlin Fashion School, I went to New York City to work as a designer for the luxury label Natori. While in New York, I discovered Etsy. I returned to Berlin two years later to start my
shop. In addition to being an Etsy Seller, I design costumes, author a blog, and post videos to YouTube. (Visit Xenia’s Facebook page, find her on Instagram at @fashionrolla, and on Twitter at @fashionrolla.
This cape with bear ears is very easy to make. Your child will be the cutest – and warmest – kid on the block.
You will need:

Fold the knit in fourths so you have 4 layers.
Place the tape measure on the corner, measure down the half of the wingspan, and draw the circle with the chalk.
Measure down the neck radius and draw the neckline.
Cut out the cape pattern.

The hood pattern
Draw and cut out the hood pattern.
Pin the edges of the hood.
Sew the parts together with the zigzag stitch.
Put a plastic hand gauge under the feet so the seam doesn’t stretch.

Flatten the seams with an iron if it’s stretched.
Turn 2 cm (1.6″) outside the hood edges and front of the cape. That way you will have a contrast piping.
Seal the seams with the zigzag stitch.
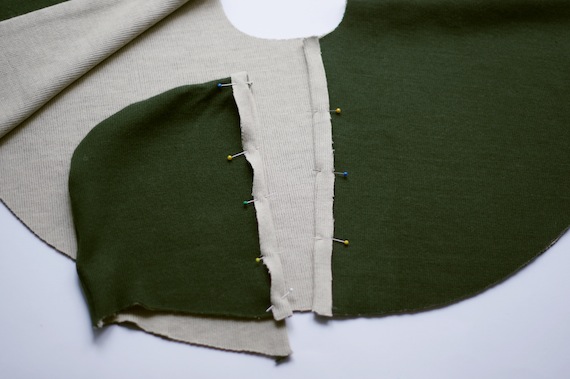
Find the middle of the neckline, match it to the middle of the hood and pin it together. Pin the bottom seam of the cap.
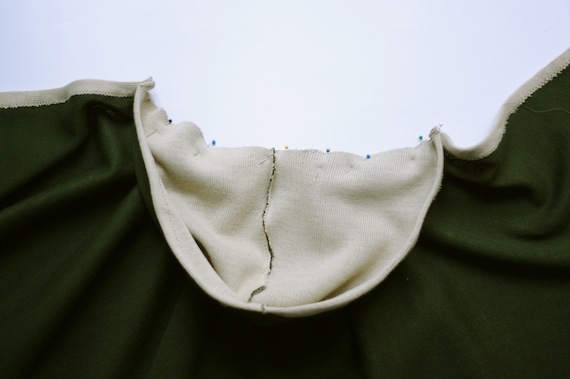
Seal the seam with contrast zigzag stitching.
Make an eight shape from the cord and sew the ends together.
Attach the cord closure and button to the neck.
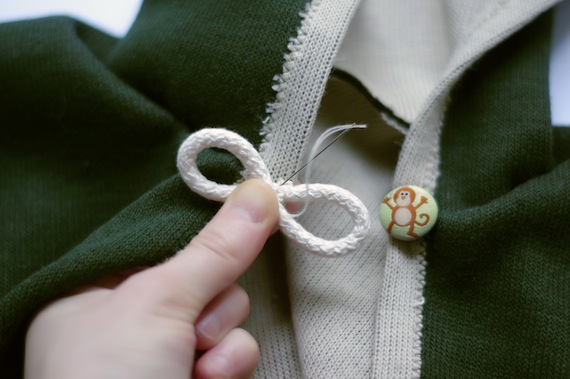
Cut out the ears.
Turn the ears inside out and iron them flat.
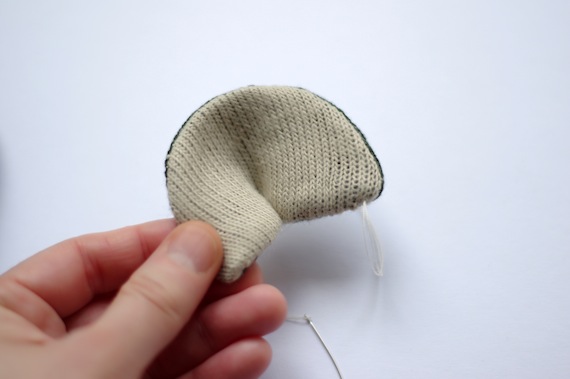
Attach the ears to the hood.

And voila: The cutest kid on the block!

The finished product
Want to know more about Etsy?
Many Etsy sellers are mums just like you.
Open a shop on Etsy.com – the online marketplace for handmade and vintage products – and sell what
you make or collect to millions of people around the world.
Get 20 free listings when you open your first Etsy shop. After that, it costs only $.20 to list an item for
four months.

About
BritMums is the UK’s original collective of lifestyle bloggers and digital influencers, fueling the country’s most influential social content. We lead the online conversation with members who are parent social influencers creating content on topics ranging from food, parenting, travel, politics, style and more.
Amelia Appletree
Tuesday 7th of January 2014
What a lovely cape!
I run an Etsy shop myself and found it great for networking with other crafters. Very exciting to see you partnering with them!
Jennifer Howze
Tuesday 7th of January 2014
Amelia, Thanks so much for the comment. It's great to hear you've had a good Etsy experience. We're excited about working with them.